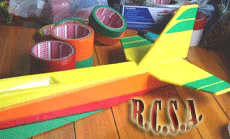
Let’s get to the point. Today we are going to make the tail of the airplane craft. The tail section consists of horizontal part (STAB)* and vertical part (FIN) made out of 5-mm thick foam. (picture below) You can also make it curved for better look.


Put the pattern on the foam and draw the line for cutting.

Use cutter.

So we will get these two pieces.

Then, glue the tail section of the body of a plane.

Put the horizontal piece on the tail section and wait for the glue to dry.

After that, glue the symmetry line of the STAB.

After that, glue the symmetry line of the STAB.

Put the vertical piece on the line that is glued and then wait for the glue to dry.

Make sure that the fin is perpendicular the body because it affects the flying of the plane.

Next, we will make the part to put together the wing and the body. Dig the stick in to the side of the body about 1- 1.5 inches from the top. And dig another stick in at 1 inch after the whole to put the wing about and 1-1.5 inches from the top.

This is all for the tail section. Next, you can decorate it by sticker or tape or whatever you like.
Next time, we will do the wing!!!
*Stab is from stablizer.


1 comment:
NIce blog... keep it up...
Post a Comment